LUMU – Smartphone Light Meter for your DSLR – Review
Introduction
Simplest explanation what is a light meter can be found on Wikipedia off course.
First of all I am not one of those Photographers that reach out for a light meter for every single occasion, probably most of professional photographers doesn’t do it either. But on other hand, we all get to situation where conditions make us make wrong shots and afterwords trying to fix impossible. In those situations light meter could help.
Still, big question is: Do you really need a Light Meter?
And if you decided that you do, which one to get?
So I will try to help you out with choice and review one light meter that I got: LUMU Light Meter for iOS and some Android Smartphones.
Light Meter vs In Camera Meter
You might be professional photographer that knows every single time for every single shoot which exposure and aperture to set. Today, DSLR cameras let us take images much simpler and more affordable than before. If you don’t like image that you took, you can do many actions: erase, take new shot to replace old one, change settings, easily edit photo in post process without loss of quality, especially if you take as all pro’s photos in RAW format.
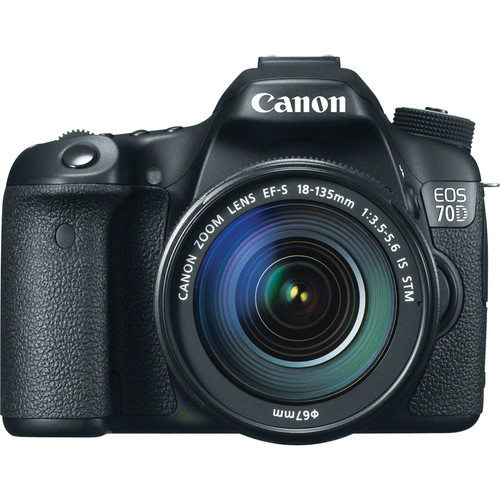
Canon and I believe other brands have similar inside Light Metering system. For example Canon 5D Mk II and MK III have 4 modes:

Do you need a Light Meter?
Simply put if you managed your ways before, without one, you could carry on without it, which is a simple and true fact. But having one has its pros, you can’t have cons owning one, as you could always use your in camera metering.
There is no right or wrong way. You should find what best suits you. If you are shooting on setup where light is constant and there are no shiny objects, you should go right away with a light meter.
What I like to do is to always measure light with a light meter where I have a constant light, that way I learn about light. And in cases when even light meter doesn’t help, you always have starting point.
What I love about light meters is that it helps me get to perfect exposure in less time than trial and error technique and as said above, it helps me learn the light and setup my camera settings faster and better every single time.
When and why to use a Light Meter
I will not go deep into what and how light meters work, simple definition would be that your DSLR camera measures light from reflections of your scenery while light meter measures incident, direct light from direction where you point it.
There are different versions of light meters, with many functions and capabilities, most of stand alone light meters measure strobes/flash and constant light, with option to calculate average from more measurements, to save measurements etc.
In situations where you have extremes, or above or under average brightness your camera will try to compensate it, leaving us with sometimes over or under exposed images. To get it in the middle or where we want it, we would need to measure light differently or at least adjust camera settings manually, because camera doesn’t know what we want.
Differences between LUMU and other light meters

First of all LUMU is not stand-alone device, you should have Apple or Android phone with you. LUMU does all measuring and iphone (ipad and other devices) do all calculations and interaction with you.
Lumu Features:
LUMU Pros
- Small
- Light
- Easier to use and adjust
- GEO tagging
- Notes
- History
LUMU Cons
- LUMU can’t be used with Strobes
LUMU is very small, comes in professional package, very well build casing, and it has small lather bag to keep it safe, comes with neck strap while you are on set and with free app for your Apple or Android device. There is no light meter that can match LUMU for the price.
Detailed test with 7 different scenes
I made over 70 images and went through all metering options of Canon 5D Mark II and couple of metering options with LUMU light meter.
Test was repeated at least 2 times for different scene but same conditions.
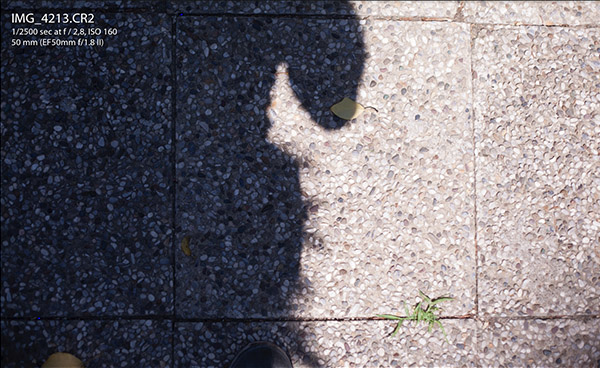
During this test I found out one more little CON for LUMU light meter, when you input wrong settings, like I did, f2.8, ISO 160, and tried to measure direct sunlight in the noon, LUMU app couldn’t measure it, it showed me f64, 1/8000 and ISO 160, which is impossible. It made me think that direct sun light is too bright and that I can’t use it. But I tried to change f-stop and tried again, and it solved mystery. I bet they could solve it by software, if for desired f-stop measurement is impossible, it should show first one that is possible or at least tell you to change any of the settings.
After change f-stop to f6.3, it measured 1/2000 for ISO160 for direct sunlight.
For most of the testing I used f2.8 except for ones where I had to measure direct sunlight in “Photo” LUMU mode, as you know LUMU has as well “Multi” option, where you can get average of multiple measurements, in this mode, it worked even for f2.8 if I measured first darker area then direct sunlight.
All tests were on same ISO160 setting. Around noon, Summer day (extreme condition not ideal to take any shots at all).
One more note to bare in mind, for LUMU it is not important where is your focus point with DSLR, while for DSLR it is important where you point your camera, as it takes, measures reflections more center weighted.
So here is my opinion and results I got from 7 test:
1. Dark scene at f2.8
Scene where I covered whole frame with dark tree bark or soil with fallen brown leaves.
LUMU measured 1/200 at f2.8 and ISO160 in Photo mode, while all Canon 5D Mark II metering measurements were same, 1/30.
So if we compare images that I took, we would get dark image taken with LUMU settings and much brighter (+2.33 stops brigther) taken with all metering camera settings.
With 100mm f2.8 lens, it would be almost impossible to get handheld shot with any of metering readings, while 1/200 which LUMU measured is spot on, hand held shot, plus I was able to add that +2.35 exposure in Lightroom to get exactly same brightness like 1/30 shot if I wanted, without quality loss.


Winner: LUMU
Note: Repeated test, shoot towards soil and fallen leaves, got very similar results as above.
2. Bright Scene at f6.3
Scene where complete framing was pointed towards bright background, in my case I pointed it to concrete that was under direct sun light.
First measurement was faulty one, from LUMU, where I thought that I will not be able to measure light from direct sun light, as it gave me this weird result f64, 1/800 at ISO 160, just later on I figured out that it works just fine for smaller apertures like for example f6.3 which usually I use the most.
I made Multi measure (average from shadow, direct sun light and reflection of the concrete), got 1/3200, for f2.8
Measurement from DSLR was same for all metering options and was 1/6400.
DSLR saw concrete as too bright and made it look darker than it is, one stop darker than LUUMU. By my opinion LUMU was if not perfect spot on, very close to what it looked a like with bare eyes.
I made 2nd run for this test and repeated process on my balcony, made shot of my notes on the white paper.
With LUMU I got readings: 1/2000 shutter for f6.3 while DSLR results were not completely same all were darker than it should be, 1/4000 and 1/8000.


Winner: LUMU
3. 50% Bright / 50% Dark Scene
I didn’t want to use black and white paper; as such test exists on youtube already. Yes it would be perfect example for Bride and Groom.
Focused on border between bright and dark (shadow), and in real case scenario you would not focus between bride and groom, or maybe not focus but measure light.
For this test as above I thought at first that LUMU couldn’t measure direct sunlight so I made multiple measurements, one from the shadow, one from direct sunlight and one above concrete LUMU turned towards ground (concrete and shadow light reflections), got 1/2000 and DSLR results were mixed, either 1/3200 or 1/2500.
All images were good, but LUMU one looks closest to what our bare eye can see. All images could be post processed in Lightroom or Photoshop without quality loss.
Repeated results were similar too, but difference is that I made two LUMU measurements, one from direct sunlight and other with multiple measurements (shadow + sun). On this test LUMU and in camera metering system were very similar. With direct sun light LUMU measurement I got few dots of complete black that cannot be saved in post process if you expose photo or shadows, while multi result was same as in camera metering, except spot metering, where it really depends where you point your camera, more to the darker or lighter side. Off course I could turn LUMU vertically, like my camera is pointing to the subject, I would get more precise measurement.

Winner: Tie
Little hint for Bride and Groom, you can always meter light on one then other with Spot Metering, and try to find middle or even slightly under exposed image.
Goal is to make groom suit to be almost dark but not completely black (bit under-expose image), you can correct it and adjust it in post process. If groom goes too dark (black) or bride goes too bright (white), you can’t save it later, no matter what you do, you will wash out colors, best thing if it happens, only if you have to, to put that image in BW.
4. Bright subject darker background
For this test I pointed DSLR into satellite dish with dark background.
LUMU multi measure: (direct sunlight and one in shadow), got 1/2000.
DSLR had all readings different between each other: 1/4000, 1/8000. 1/8000, 1/2500. Last one is center-weighted average [ ]. Most correct compared to bare eye was LUMU multi and closest to natural look from DSLR was center-weighted average, rest was too dark.
For repeated test I put T-shirt partially on the sun, while rest of the t-shirt and background was in shadow, this is extreme condition, as we have pure white and almost black.
LUMU measured on pure sun 1/2000 for f6.3, few completely black dots in bottom right corner, multi measurement from LUMU said: 1/400, few hot-spots on T-shirt, nothing that looks un-natural.
DSLR on other hand had measurements: 1/800, 1/800, 1/6400, 1/1000. Weird, but 1/2000 from LUMU had less under-exposed dots unlike 1/800 measured from camera, probably conditions changed, results were very similar. Except 1/6400 for spot metering, which was complete miss. Again center-weighted average metering was most precise and closest to LUMU metering.


Winner: Tie
( between LUMU Multi option and DSLR center-weighted average metering [ ] )
5. Dark subject lighter background f6.3
I put Rebel T2i (550D) on the balcony concrete, where sun was shining hard.
To measure light strength with a light meter, I put LUMU on top of the DSLR, and got 1/2000 for the shutter.
Multi metering was 1/800 (one direct sun light and one reflection from balcony concrete).
Camera metering as follows: 1/400, 1/400, 1/320, 1/800
I find on this test all Canon metering more correct than LUMU “Photo”, one measurement.
There were couple completely black dots, shadow under flash bump for 1 measurement from direct light, so I had to take Multi as the one to compare with Canon 5D Mark II metering system.
Again center-weighted average was on the spot and par with LUMU multi metering, and it is much easier to dial [ ] metering on the camera than setup LUMU and measure.

Winner: Tie
(Slight advantage towards DSLR only for center-weighted average [ ] because of simplicity)
6. Normal Landscape with a focus on the bright area
For this test, I put white T-shirt on balcony and made couple of measurements with LUMU light meter. 1st pure sunlight, 1/2000, and two Multi measurements: 1st 1/500 (direct sunlight + in shadow towards camera) 2nd 1/320 (direct sunlight, shadow towards camera and direction from camera towards T-shirt. Obviously 1/2000 is correct exposure for white T-shirt on balcony. But rest of the image was too dark. Image could be saved with lowering Highlights and increasing Exposure in Lightroom.
DSLR (5D Mark II), had very different results between each other. First Evaluative Metering was same as 2nd LUMU Multi, 1/500. Rest was 1/1600, 1/3200 and last not savable 1/320.
Note: Results would vary for amount of bright area in the frame. T-shirt was relatively small compared to whole frame, but was enough to put whole center (focus dot) inside white area. This is very good example where light meters ease up workflow.


Winner: LUMU
7. Normal Landscape with a focus on the dark area
Same scene as above, just focused on the area in the shadow and then repositioned camera for framing.
LUMU readings were as above (1/2000, 1/500 and 1/320). Canon metering readings were: 1/50, 1/40, 1/40, 1/100
It really depends where is your focus point and how big is contrast between bright and dark area.

Winner: LUMU
Note: Another example where LUMU is clear winner. While in some cases you might get right exposure from your camera, it is really hit and miss in extreme conditions.
Hint: When you get to conditions where you have big difference between darkest and lightest area and you don’t have Light Meter with you. It is always good to go bit on the darker side. You should make two measurements with spot metering, towards lightest point in your frame and darkest, and then try to see if two stops up from darkest doesn’t over-expose lightest point.
Example, you measure forest (dark) with 1/200 and lightest point with 1/1600. Notice that two stops up from 1/200 is fastest you can go not to make dark area complete black and notice that two stops down is for most DSLRs slowest shutter not to make lightest point complete white. Thus: 1/800 and 1/400 are extreme points. Meaning that anything you shoot from 1/400 till 1/800 will be enough to save both ends. And taking in account our advice to go bit on the darker side, you can shoot 1/640 and save both ends with little space for change and still to be in sweet spot.
For absolute extremes you will have to decide which one to save or to make two shots and later combine them in post process, best when made for static scenery and with tripod.
Test Conclusion:
You should take in consideration that I took extreme conditions as example. For less contrast light conditions in camera metering would give almost identical if not identical numbers as LUMU or any other light meter would do.
We should not compare in camera metering with external light meters, as good or bad, both have their advantages and disadvantages.
For professional work, you should do both, in camera metering and light meter and compare results on your computer, to see if you have any area where you lose colors or details. Once you get to know your equipment, you would find that perfect exposure more accurate and faster than before. Overall, you should learn about light!
For everyday shooting you would most probably skip using Light Meter, but for professional work where scenes are more demanding, trust me it is easier to take out LUMU and make multi measurements to be sure you nail that sweet spot.
Final Thoughts about LUMU
Great thing about LUMU is that I do not have to worry about it. It fits my bag or any pocket and I can carry it around without issue, all worry goes that my phone is charged. What I really love is that I’m able to take shoot of my setup, store all settings, including GEO taging, write a notes and keep history of measurements for every single setup I need.
I would recommend Light Meter and especially LUMU for travelers and photographers/videographers that shoot mostly under natural or constant light.