How to shoot a car
This topic can also be related to motorcycles, buses, trucks, any vehicle – It doesn’t matter. But I’ll refer to it as car photography just to keep it simple.

So you love cars or just like to take pictures of them? Considering you already have a camera, all you need is a decent car to shoot. Finding one could be a problem depending where you live but it shouldn’t stop you. Start with yours or your friends, make some good stuff and show them to others. You may even try joining some domestic car/motorcycle forums and present them with your idea/work. Once you’re on a roll you won’t stop. You may try and get some inspiration from car magazines, take a look and try to imagine how they made a particular shot. The ability to visualize the image in your head before you actually take it can be very useful when shooting a car. But before you go out and start shooting anything that rolls take your time and read this simple how to – it may save your time and give you a head start.
Car photography can be divided in two major sections:
- still car photography
- motion car photography
Still photography
As its name speaks for itself, it relates to vehicles that are not moving. Plenty of the pictures you’re going to find online are still photos, mostly because they are easier to make, easier to light and eventually post process. For still photography important factors are: where, when and how.
Where?

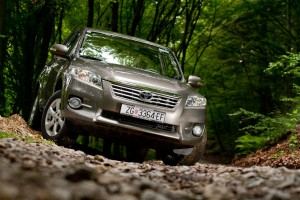
First of all you want to find a location or surrounding in which you are going to place your car. You may wish to choose that regarding to the color of the vehicle or the nature of its appearance and purpose. For example – you are not going to shoot a Mercedes SLS parked on a mud road, or braking trough the water, or put a Toyota SUV on a race track. Ok, you are not always obliged to blend your car’s purpose and stile into an ‘adequate’ environment. Sometimes you can use a contrast background like a deserted old factory, cracked walls, or similar to distinguish and highlight the beauty of the vehicle being photographed. Some may consider a nice museum or a castle as a background but pretty buildings may not always be the best solution as they might steal the attention away from your car. It’s all up to you (or your editor if you work for a magazine).

Positioning
You may wonder how the car should be positioned in front of the camera. To be honest I don’t have an exact answer to that question – all I know is if it’s right or wrong. I could say that most of my cars pictures are taken at position approximate 30°-45° of the car’s rear-front axis but I don’t measure it and I don’t do it all the time. You can even lie on the ground or stay on the ladders. If it is going to be just one picture presenting the car then the tendency would be to capture both the side and the front of the vehicle. But as I said – it’s not a rule and you may approach in any way as long as it looks alright. The angle you approach your object may depend on a lens used to do it. I personally use EF 70-200 f2.8 L mostly to freeze and for panning, but also when I desire some nice bokeh. For all the other stuff I use EF 16-35 f2.8 L II because it’s great for still, motion, interior and detail photography.
When (Light)

The next important thing refers to the light or the time of day you are planning to take those pictures at. If you’re on a tight schedule than you’ll have to adjust and work with what you have – sorry.
If you have some spare time, you should go for the part of day when the light is soft to avoid harsh contrast as a result of a bright sun coming down on only one side of your object. For example, taking shots of a car at 12 o’clock noon is horrible as the sun lights the car form the top, and getting the right exposure to fit all the car parts is impossible. You may use HDR (High Dynamic Range Imaging) or extra strong external lighting to fill on those dark areas but I would rather try and find some kind of shade, any kind. Taking pictures in the dusk or dawn would be my choice. The downside may be the light that changes fast (depending the part of world you live in) so you’ll have to adjust accordingly.

Use of Flash in Car photography
Soft light should provide you with an easy way of getting the right exposure and allowing you to concentrate more on the composition and background but what if you would like some more drama into it? Here is where the lighting comes back again. This time it isn’t’ the sun, this time you control the light. Your flashes are a powerful tool when it comes to car photography. That extra glow they can put on an object being photographed makes a noticeable difference. They are great because they can be adjusted in both direction and intensity and that’s all it takes. You try and see what works the best for you. Having a couple of external flash units would be great as you could position them around the car to achieve a desired effect. But what if you only have one? Don’t worry, there’s a way. With only one external flash like e.g. Speedlight 430EX and a wish to light a car from various sides, you are going to need a tripod. A tripod will give you a fixed point in which your camera will be during numerous shot being taken. With only one light source, you’ll have to take several pictures and combine them later into one. Each time you take a picture, the light (flash) should be pointed at a different spot needed to be lightened. Having those car parts partially flashed and being in the same position regarding the camera, it shouldn’t be a problem stitching them into a perfectly lightened picture. But watch out for the camera settings – you should always shoot in full manual mode and with manual focus to avoid any changes in exposure, aperture or focus.

To fire external units you will need to have some kind of remote triggering. Some cameras like Canon 7D have the built-in pop-up flash that can trigger an external slaved unit. With other, you can use Speedlight 580EX as a master trigger but that will require at least two flash units (one to trigger with, one to fire). You may also use pocket wizzards, radio poppers, or similar. There is a way to use external flashes without having any kind of remote triggering but I’ll talk about that later.

You may also consider taking night shots of your cars. Night will give you an opportunity to use long exposure. Long exposure is great when you have something moving in background or just want to highlight the car in dark environment. Background movement will result in different trails depending on the source. A moving traffic is a great way to start as the cars, trams and buses that pass leave light trails that look very effective. Long exposure also gives you time to light your car. You can either do it by triggering flashes or by light-painting.
Light Painting
Light painting is a is a photographic technique in which hand-held light source is being used to light up the object during the exposure like in the photo of a green car (on the right). Although funny and effective, paint by light has some flaws such as possibility of uneven lighting and undesirable reflections. If you wish to use external flash but don’t have a trigger system of any kind, long exposure will help you with that.

During the long exposure you have enough time to manually fire the flash before the shutter closes. In fact, depending on duration, you may have a tone of time to fire continuously and end up with a single successful photo. You’ll have to set you flash power manually depending on your camera settings, color of a vehicle (darker colors need more light) and times that you’re willing to fire it.
Conclusion
Car photography can be easier than you think, especially if you prepare in advance. Check out others work online or view car magazines. Try to figure out the lighting and setup, find location in advance, wait for the right time if you can. Learn from others.
This is first article about car photography, there is more to come, we will cover motion car photography and post processing tricks, stay tuned…
 Canon5Dtips Photography is more than words.


